On pressurising the fuel tank, Paraffin,
(kerosene), is forced from the fuel tank through the
rising tube. The burner tubes are pre-heated
by methylated spirit, (alcohol), in the spirit cup below
the burner.
When sufficiently heated a fine spray of hot paraffin gas leaves through a jet at
the centre of the burner, air mixes with the gas and the
mixture hits the burner plate where the flame ring
directs the gas into a circle. Here the gas burns with
the characteristic sound that gives this style of burner
the name 'Roarer'.
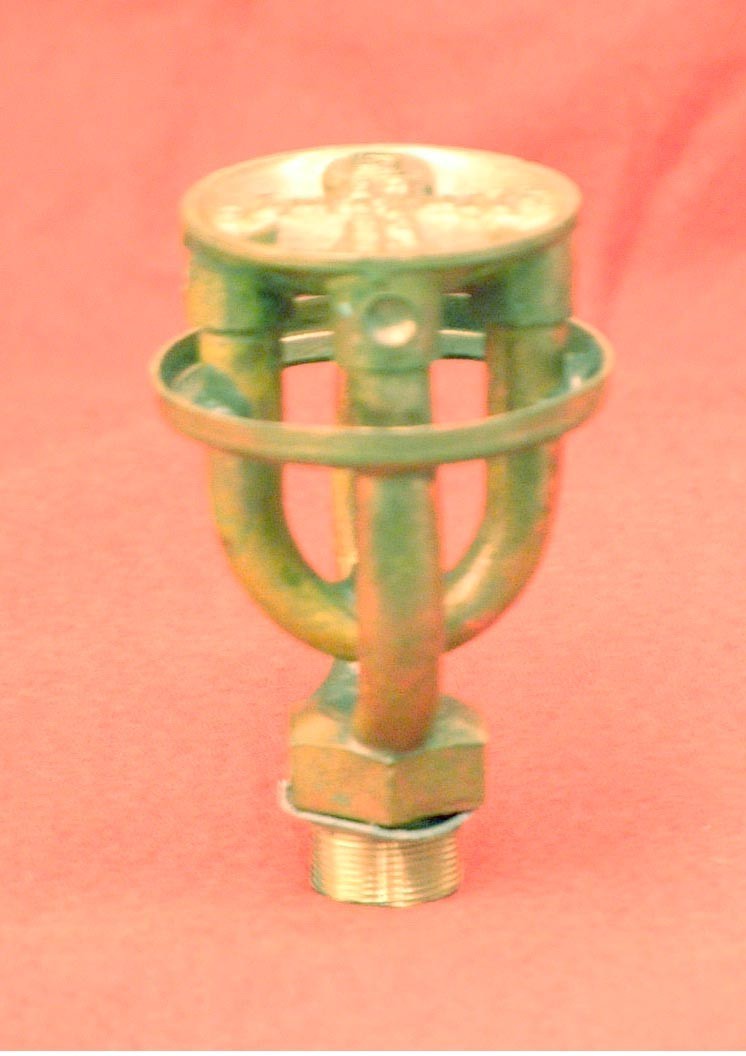
The Roarer burner illustrated on the
right has had its flame ring removed for clarity.
| Stoves
with burners of this type are numbered 00,
No1,
No2, No3, indicating the increase in burner size.
A similar design of burner is often incorporated
into the tap unit of petrol, (gasoline), or
multifuel stoves such as the Optimus No22 or
No.111. A simpler design of 'Roarer' burner uses a single brass or steel vapourising tube incorporating a fine hole at the top, there is no jet. A pre-heater cup is loose fitted around the tube and a burner head with flame spreader rests on top of the vaporiser tube. Stoves using this burner design include the Optimus/Primus No.96, Primus No.100/4128 Radius No. 20and Monitor No.17 |
 |
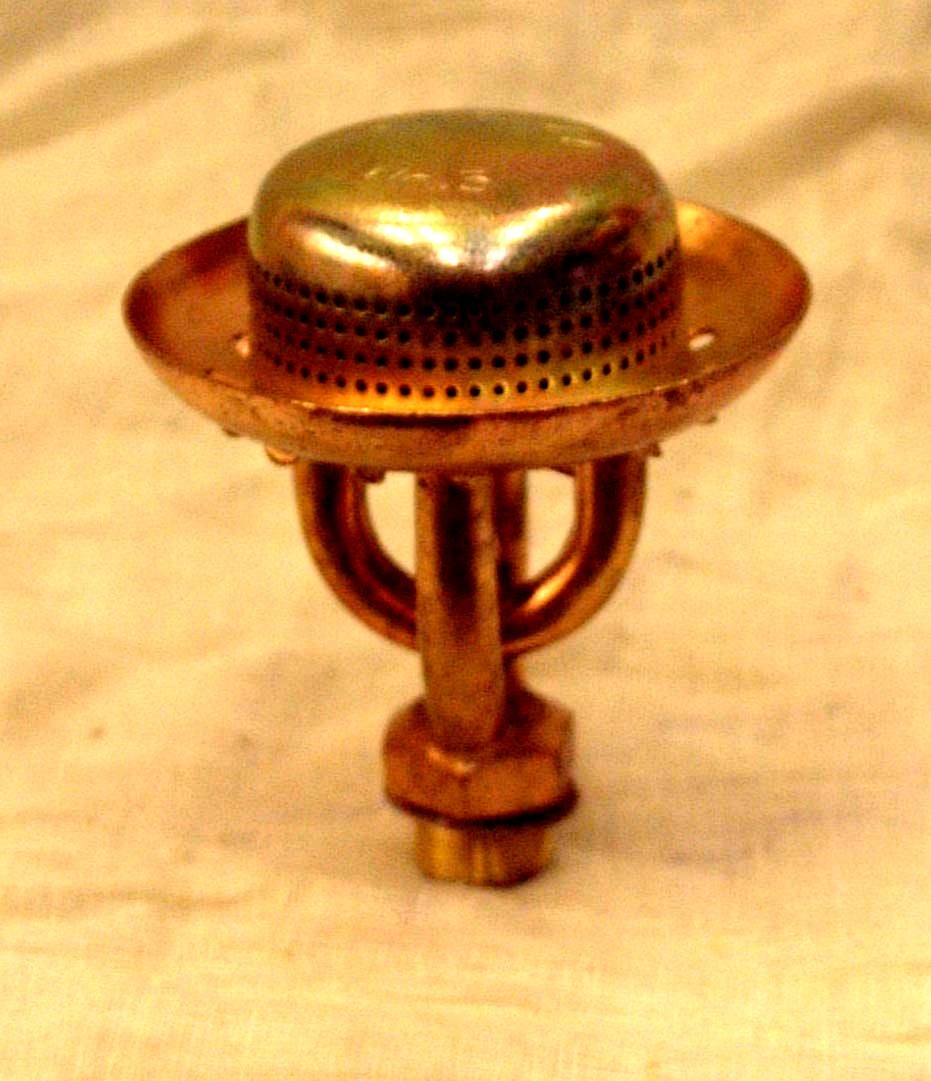 |
An alternative to the
'Roarer' burner is the 'Silent' type. Here the
paraffin gas leaves the jet at the centre of the
burner and passes through a hole in the middle of
the burner head. The gas hits the inner burner
cap where it mixes with air and passes out
through small holes around the outer burner cap
with a quiet 'hiss'. A classic 'Silent' burner is illustrated left, often stoves fitted with these burners are found with the burner caps missing. In 'Multifuel' stoves this type of burner has the advantage that the jet does not need changing to use different fuels. |
Stoves with burners of this type either continued up the numbering scale, ie No.5 and 10. Some manufacturers offered stoves with a convertible burner, able to be used as a 'Roarer' for fast boiling or 'Silent' for better cooking. The Primus No.100/4043 and Svea No.100 are examples of this type of stove. It is rare to find these stoves with all of the burner components intact
Lighting procedure for a Paraffin stove is as follows:- |
1)
Make sure the air screw is loose to release any existing
pressure.
2) Unscrew filler cap and ensure there is sufficient
paraffin,(kerosene), in the tank, approx. 3/4 full,
replace cap.
3) Fill the preheater cup with methylated spirit,
(alcohol) and light. Ensure stove is sheltered from the
wind or fit the windshield.
4) LEAVE THE STOVE ALONE!!, don't fiddle!, when the
spirit is almost burned out close the air screw and give
a few strokes on the pump, the stove should light at the
top of the burner. Have a match or lighter ready in case
the stove does not light immediately.
5) Should the flame burn unevenly around the burner the
jet may be blocked.Wire cleaning needles or 'prickers'
are used to reach into the flame and clean the jet. Use
the correct diameter 'pricker' for the stove, 0.2mm -
0.3mm, bent pieces of wire etc. will damage the fine jet.
6) If the stove flares release the pressure by opening
the air screw and allow to burn down. Before re-lighting
the stove always loosen the air screw to release any
pressure present.
7) To adjust the hight of the flame at the burner loosen
the air screw gradually, this releases some pressure and
the flame will go down. To increase the flame again
increase pressure by gentle pumping, do not over-pump or
the tank can be damaged.
With practice it will take less time to light your stove
than read these instructions!.
Additional notes for stoves with a flame control tap or without a pump. |
A
control tap is found on some traditional designs of
stoves, ie. Optimus No.5R and other Models ie. Optimus No.8R, No.111, No. 123R, Primus No.22.
1) Where an air screw is not fitted loosen the filler cap
to release pressure and retighten.
2) Ensure control tap is turned off and preheat as No.3
above.
3) When the spirit is almost burned out give a few
strokes on the pump and open the control valve, the stove
should light at the top of the burner. Have a match or
lighter ready in case the stove does not light
immediately.
5) Should the flame burn unevenly around the burner the
jet may be blocked. On models with a built-in cleaning
needle quickly turn the control tap full on then turn
down again. this should clear the jet.
4) To adjust the hight of the flame at the burner simply
turn the control tap. Some models have a built-in
cleaning needle, (No8R, No111, 123R), do not use the
'clean' position to achieve a gentle simmer as premature
wear will occur at the jet!
5) If the flame begins to falter during cooking and there
is still fuel in the tank then increase pressure by
gentle pumping, do not over-pump or the tank can be
damaged.
Some stoves, particularly petrol, (gasoline), fuelled do not have a pump,
ie. Primus No.71, Svea No.123, Optimus No8R.
Follow instructions from 1) above. Simply warming the
tank with the hands or the heat from the pre-heating
spirit will be enough to get the stove started. After one
or two minutes the stove will reach operating temperature
and settle down to a steady flame. A seperate 'Mini pump'
was specified for Optimus stoves when used in very cold
weather where vapourisation is too slow. Models fitted to
take the 'Mini pump' like the No.8R and No.123R can be
identified by the long projection from the filler cap
where the pressure release valve is fitted.
It is important with the smaller stoves not to use too
large a pan on top as the reflected heat downwards can
cause the pressure release valve to blow.
Last updated on 17/07/19